


Select a galvanized steel lighting pole from the real road layout, fixture data, structural basis, foundation interface, coating environment, document scope and delivery plan—not from height alone.

A street light pole is one component in a coordinated lighting structure. Its shaft supports the arm, luminaire and any approved accessories; its lower end connects those loads to a foundation or embedded support; and its internal space provides a protected route for project-defined electrical equipment. A nominal height or wall thickness does not describe that complete assembly.
A reliable selection process starts with the lighting design and closes the structural, civil, electrical, corrosion-protection, manufacturing and logistics interfaces in a controlled order. This guide helps buyers organize those inputs. It does not replace project-specific calculations, the responsible local engineer's review or the requirements of the governing authority.
Send the road cross-section, lane and median widths, pole setback, proposed locations, mounting-height reference and luminaire positions before choosing a shaft. The layout reveals whether poles stand on one verge, both sides, a central median, a parking island or another defined support line. It also shows conflicts with barriers, signs, trees, utilities and maintenance access.
The lighting designer uses the selected luminaire, optic, tilt, mounting height and surface data to evaluate illuminance, luminance, uniformity and glare under the applicable project criteria. Pole spacing should follow that calculation. Copying a spacing-to-height ratio from another road can create dark areas, excess light, glare or unnecessary quantities because the optics and geometry are different.
A value such as 8 m, 10 m or 12 m may refer to shaft length above the base, luminaire mounting height, overall height including arm rise or another project convention. State the reference in words and show it on the general arrangement. This prevents the supplier, lighting designer and installer from using the same number for different coordinates.
Height affects light distribution, wind action, shaft demand, foundation reactions, transport length, lifting access and maintenance equipment. A taller pole is not automatically better, and a shorter pole is not automatically more economical once additional quantities and civil works are considered. Review the complete lighting and installation plan rather than optimizing one dimension in isolation.
Product pages can help a buyer organize typical questions for a defined range. Review the 8m galvanized street light pole, 10m single-arm pole, 10m double-arm pole, 12m highway pole and 15m highway lighting pole for controlled procurement intent.
The final shaft dimensions, material schedule, arm, opening, base and anchors still follow the approved project configuration. If a product page and a project drawing differ, the released drawing and contract specification control production. This distinction lets product content support early selection without turning a reference value into an unsupported structural promise.
Round, square and octagonal tapered shafts can all serve road or area lighting when designed for the actual loads. Shape affects visual character, forming method, across-flats or diameter measurements, door orientation, clamps, base covers, arm transitions and sectional joints. It should be selected with the architectural intent and manufacturing details, not from a claim that one outline is always strongest.
A round tapered galvanized steel light pole provides a continuous circular profile. A square tapered light pole has four faces that need orientation control. An octagonal galvanized street light pole uses eight formed faces and controlled across-flats dimensions. Each profile requires its own drawing and interface review.

A one-piece shaft removes a field joint but may be difficult to galvanize, transport or handle at longer lengths. A sectional pole can improve container use and site access, but its slip joint or flange becomes part of the structural load path. Segment length, compatible profiles, engagement, orientation, cable passage, match marks and assembly method must be designed and shown.
Do not treat a sectional design as a finished pole cut into convenient pieces. Ask how the joint transfers bending, shear and torsion; how the surfaces are protected during fit-up; and how the installer verifies the required assembly condition. Shipping limits and lifting plans should be reviewed before the drawing is released, not after fabrication.
A roadside single arm places one luminaire at a defined offset from the shaft. A double-arm arrangement can serve two carriageways or lighting zones from a median. Post-top mounting may suit compact area or streetscape layouts. The lighting model determines the intended fixture coordinates; structural review then includes the complete arm and luminaire geometry.
Specify outreach, rise, curvature or slope, tube section, attachment detail, mounting angle and cable route. A longer or heavier arm changes the moment and projected area. Two visually symmetrical arms can still create torsional demand under directional wind or unequal equipment. Future banners, cameras, signs or other attachments should not be added unless they were included in the approved load schedule or reviewed as a change.
The mounting choice should follow the lighting coordinates and complete load schedule. This comparison table identifies different drawing checks; it does not assign a fixed pole height or arm capacity.
| Mounting arrangement | Lighting coordinate to define | Pole/arm interface to verify |
|---|---|---|
| Single outreach arm | One luminaire offset, elevation and aiming direction | Arm projection, fixing, cable route and eccentric load |
| Double arm | Two approved fixture positions and carriageway/zone model | Both arms, unequal fixture cases, torsion and access |
| Post-top adaptor | Top-center location, orientation and optical distribution | Tenon/adaptor fit, support, cable entry and replacement reach |
Provide the fixture model, mass, effective projected area, center of gravity, mounting opening, tenon or spigot diameter, insertion length, bolt arrangement, permitted tilt and cable-entry detail. Wattage alone does not define structural load or mechanical fit. Two luminaires with the same electrical rating can have different weight, size and mounting requirements.
The pole drawing should show how the arm or top adaptor supports the fixture without sharp cable edges or uncontrolled field drilling. Confirm the installed tilt and rotation against the photometric file. A luminaire can fit the tube mechanically and still produce the wrong light distribution if its reference angle or position changes.

A useful structural inquiry identifies the applicable standard and edition, wind-speed definition, exposure or terrain, topography, importance requirement, design life or fatigue provisions when specified, temperature or ice where relevant, and the required load combinations. A context-free wind-resistance number cannot describe all of these conditions.
The load schedule must include the shaft, every arm, luminaire and approved accessory at its actual elevation and offset. Effective projected area is useful only when it corresponds to the relevant orientation and drag convention. If final equipment data are unavailable, record a conservative design envelope and a hold point that prevents unreviewed substitution.
Carbon structural steel grades differ among national and project standards. State the accepted material designation or the rules for proposing an equivalent, along with required mechanical properties, thickness tolerances, traceability and material documents. The correct grade depends on structural demand, forming and welding requirements, availability and the contract—not on one universal online recommendation.
If substitutions are allowed, the review should consider yield and tensile properties, ductility, chemistry, weldability, thickness range and the governing standard. A similar-sounding grade name is not enough. Approved drawings and the material schedule should use consistent designations so procurement, fabrication and inspection refer to the same steel.
Wall thickness works together with shaft diameter or across-flats size, taper, material properties, unsupported height, openings, welds, joints, arms, equipment loads and base detail. Copying a 3 mm or 4 mm value from another pole ignores those relationships. Even within one shaft, the approved schedule may change by segment when the design and fabrication method support it.
Ask the supplier to state the proposed section schedule and connect it to the design basis. Reviewers should also confirm which dimensions are nominal, which tolerances apply and where measurements are taken. Vague descriptions such as heavy duty are not a substitute for controlled geometry and documented inputs.
A flanged-base galvanized steel light pole uses a welded plate and an engineered anchor assembly to connect with a concrete support. The drawing coordinates plate size, thickness, holes, stiffeners where required, shaft weld, anchors, nuts, washers, conduit and orientation. It creates a clear boundary between pole and civil packages when both use the same released detail. The foundation and anchor-bolt guide explains that shared civil interface in more detail.
A direct-burial street light pole extends into a designed embedment instead. Soil or concrete contact, groundwater, drainage, backfill, cable entry, corrosion protection and temporary support become part of that system. Neither method is automatically superior; select the one accepted by the project and suitable for its civil, maintenance and exposure conditions.
The pole supplier normally provides the project-specific base and anchor interface plus the reactions or actions required by the agreed civil design process. The responsible foundation designer then uses the applicable load combinations, soil information, groundwater, frost, slope, scour, nearby structures and local requirements. A footing dimension copied from another project can be unsafe even when pole height is similar.
Before anchors are procured or concrete is placed, compare bolt count, circle or coordinates, hole diameter, projection, material, threads, templates, central opening, conduit route and orientation. The street light pole foundation and anchor bolt guide provides a detailed civil-interface checklist.

The service opening must give workable access to the terminal arrangement, protective devices or cable joints included in the project scope while preserving the shaft load path. Specify its clear dimensions, elevation, orientation, reinforcement, cover, gasket, fasteners, locking method and earthing provision. The door should remain accessible after paving, barriers and landscaping are complete.
Identify who supplies the terminal block, rail, disconnect, surge protection, glands, conductors and earthing hardware. Electrical requirements follow the project design and local rules. Avoid assuming that every pole contains the same devices, and prevent loose conductors from contacting sharp edges, standing water or anchor hardware.
The purchase specification should name the galvanizing standard accepted by the project and any required inspection, documentation, appearance, repair or masking provisions. Hollow shafts need appropriate venting and drainage, while plate geometry, seams, stiffeners and openings influence zinc flow. Galvanizing should generally follow principal fabrication so cut edges and welded details receive the intended treatment.
Coating performance depends on environment, detail design, steel condition, damage and maintenance. It should not be reduced to a fixed public lifespan. Inspection may use visual examination and thickness measurements under the selected standard and contract plan. Agree how threads, mating surfaces, identification and permitted repairs will be handled before shipment.
A compatible organic coating over galvanized steel can provide color and an additional barrier, but the layers must be designed as one system. Define surface preparation, pretreatment, primer or intermediate coat where applicable, topcoat, color, gloss, texture, masking, curing, repair and acceptance. The coating-system supplier's compatibility instructions should govern the sequence.
Coastal aerosol, persistent humidity, deicing salts, industrial contaminants, standing water and crevices may affect the protection plan. The coastal road duplex-coated lighting pole page organizes exposure-led questions without promising one universal service life. Maintenance access and drainage remain important even when a more complex coating is selected.
A project may contain verge poles, median poles, junction poles, parking-area poles and decorative units. Give each configuration a clear item mark and quantity. The schedule should link that mark to mounting height, shaft, arm, fixture, accessories, base or embedment, finish, location and required records. A drawing title that only says street light pole is not enough when several assemblies exist.
Use the same marks on layouts, drawings, calculations, material lists, inspection records, packing lists and site labels. If one input changes, identify every affected document and pole type. Controlled marks reduce the risk that a double-arm median shaft is installed on a single-arm foundation or that an accessory intended for one road section is added to another.
The general arrangement should show the height reference, shaft sections, taper, arm geometry, fixture coordinates, door, base, anchors, cable route, joints, materials and finish. Separate details may cover the arm connection, base plate, anchor cage, access opening and internal provisions, but every sheet should carry consistent drawing numbers, revisions and item marks.
A buyer should not approve the title block and overall height while leaving interfaces unchecked. Compare the drawing with the latest road layout, luminaire data, foundation concept and equipment schedule. The street light pole shop drawing checklist provides a structured review route from submittal register to final controlled release.
Inspection scope may include material identification, blank and formed dimensions, taper, straightness, twist, seam condition, openings, welds, base geometry, arm fit, galvanizing, color coating, markings and packing. The applicable standard and project risk determine acceptance criteria, sampling, hold points, witness points and records. Not every project needs every possible examination.
Distinguish routine factory controls from contract-specific tests, independent inspection or certification. If additional examination is required, state the method, location, extent, acceptance criteria and responsible reviewer in the inquiry. Broad requests for full testing can produce inconsistent bids, while an undefined promise on a webpage does not create usable project evidence.
A useful submittal package may include a drawing register, general arrangement, base and anchor detail, equipment schedule, structural design-basis summary, foundation reactions, material documents, inspection plan and coating records where required. The purchase order should identify required formats, languages, approval stages and final-record timing.
Do not assume that calculations, stamped documents, third-party reports or market-specific conformity documents are automatically included. Their availability and required signatory depend on the destination, governing rules, project responsibilities and commercial agreement. Ask the supplier to list inclusions, exclusions and open items before award, then connect the agreed deliverables to the pole marks and drawing revisions.
Long galvanized shafts need supported handling so they remain straight and their coating is not damaged. Agree bundle size, padded separators, lifting points, strap protection, end protection and the way small hardware is boxed. Arms, doors, base covers, anchors and templates should remain traceable to the correct pole type.
Container planning begins before production when shaft length or sectional construction depends on transport. Confirm door opening, internal length, weight limits, unloading method and destination handling equipment. A dense packing plan is useful only if parts can be removed safely and in the installation sequence without dragging finished surfaces across one another.
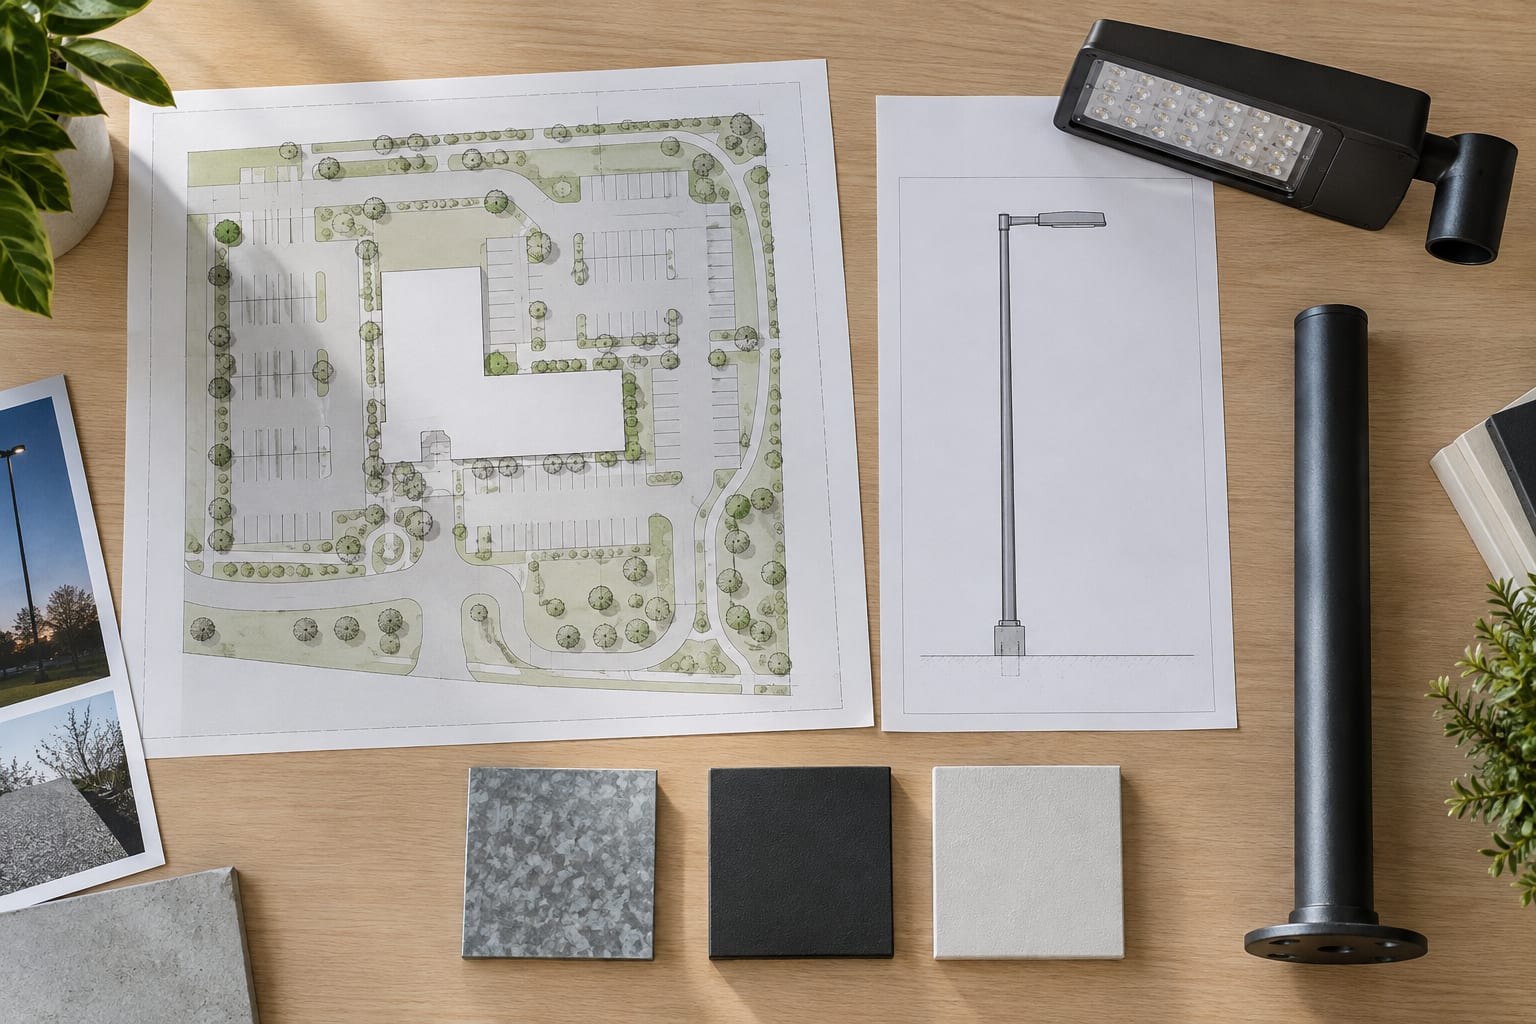
Urban roads, highway approaches, industrial parks, parking areas and public streetscapes create different optical, structural and maintenance constraints. A parking area may use several luminaires on one head, while a divided road may favor median double arms. A pedestrian-oriented streetscape can prioritize proportion and finish but still needs a verified structural shaft and accessible internal service arrangement.
Use the galvanized steel parking lot light pole page for area-lighting intent and the decorative galvanized street light pole page for appearance-led coordination. Traffic signals, signs, cameras or multiple service systems may require a separate multi-function traffic signal pole scope rather than an attachment added to a standard lighting shaft.
Before comparing offers, normalize the pole marks, material standard, shaft geometry, wall schedule, arms, fixture assumptions, wind basis, base, anchors, doors, terminal scope, galvanizing, duplex coating, drawings, inspection, packing and delivery boundary. A shorter offer can omit items or use different assumptions without making those differences visible.
Ask each bidder to identify deviations, provisional inputs, exclusions and actions needed before production. Review whether the proposed drawing process, revision control and traceability fit the project schedule. Supplier comparison becomes clearer when every offer responds to the same schedule and evidence requirements instead of presenting unrelated catalogue models.
| RFQ block | Information to send | Why it matters |
|---|---|---|
| Layout | Road cross-section, locations, setbacks and quantities | Connects the pole to the lighting and site plan |
| Geometry | Height reference, shaft shape, arm reach, rise and direction | Defines physical form and fixture coordinates |
| Equipment | Mass, EPA, center of gravity, interface and accessories | Establishes structural and mechanical inputs |
| Design basis | Standard, wind definition, exposure, topography and other actions | Prevents a context-free capacity claim |
| Civil interface | Flanged or embedded base, anchor scope, conduit and responsibility | Aligns pole, foundation and site work |
| Finish | Galvanizing standard, exposure, optional color and inspection | Defines the corrosion-protection package |
| Deliverables | Drawings, records, packing, destination and review stages | Makes technical and commercial scope comparable |
If some inputs remain open during budgeting, mark them as preliminary and require confirmation before release. A transparent assumption register is more useful than a detailed-looking offer built on hidden defaults. The final purchase specification should close the open items or state the controlled action for each one.
Height omits loads, shaft, arm, base, steel, opening and coating.
Fixture mass, EPA, center of gravity and mounting data are also required.
The code, wind definition, exposure, topography and complete assembly matter.
Pole reactions, soil, water, slope and local civil requirements can differ.
Cameras, signs and banners change area, weight, eccentricity and access.
Name required drawings, records, approvals and witness points in the RFQ.
This order limits rework because each decision provides inputs for the next. It also creates clear hold points. A fixture change returns to lighting and structural review; a foundation change returns to base and civil coordination; a transport change may return to shaft segmentation and site assembly planning.
Confirm unloading access, storage supports, crane or erection equipment, road closures, foundation release, pole orientation, arm assembly, cable handling and maintenance access. A product that fits the design but cannot pass through the site entrance or be lifted within the work zone is not an installation-ready selection.
The street light pole installation guide organizes receiving, foundation checks, lifting, alignment, wiring interfaces and final records. The supply package should give the installer clear marks and current drawings without prescribing tasks that belong to the contractor's site-specific lifting and safety method.
Early project work may use assumed mounting heights, fixture envelopes, wind inputs or quantities so the team can compare concepts. Those assumptions should be visible, dated and connected to an owner. Mark preliminary dimensions and identify the information needed to close them. A preliminary schedule can support planning, but it should not silently become the fabrication instruction.
Before production release, reconcile the road layout, photometric file, pole schedule, fixture data, structural basis, base and anchor drawing, foundation responsibility and coating specification. Close comments on one revision and record the release status. If civil work must begin earlier, use a formally controlled interface package and state the remaining restrictions rather than relying on an email attachment or an old catalogue sheet.
A later substitution can change more than appearance. A new fixture may have a different mass, EPA, center of gravity, tenon and optical distribution. A steel or coating substitution may change material properties, fabrication controls or required evidence. A moved pole can affect spacing, cable length, foundation conditions and roadside clearance. Route each change to the disciplines affected by it.
Record the proposed change, reason, affected item marks, technical comparison, approval and revised documents. Do not solve a mismatch by enlarging base holes, drilling a new arm connection, bending anchors or changing fixture tilt in the field without review. When learning how to choose a street light pole, include the change-control process itself: it protects the design intent after the first supplier comparison is complete.
Use the photometric design, road geometry, fixture, setback and maintenance plan.
No. Add the shaft, arm, fixture loads, wind basis, base, finish and documents.
No shape is universally best. Compare appearance, interfaces, manufacture and project loads.
No. Send mass, EPA, center of gravity, mounting and installed position.
No. The standard, speed definition, exposure, topography and attachments are also needed.
Thickness must be evaluated with geometry, material, openings, joints and loads.
Choose from the project foundation concept, soil, exposure and maintenance requirements.
Name the accepted galvanizing standard and add a compatible duplex system when required.
Request the general arrangement, base, anchors, arm, opening and agreed design records.
After required inputs, comments and interfaces are closed on the released revision.
Send the road layout, pole schedule, fixture and arm data, structural basis, foundation concept, coating environment, required documents and destination. Jieyao can organize the open items and prepare a project-specific configuration for technical review.
Send Your Pole Requirements
Street Light Pole Height Guide: How to Select Moun
Integrated and Split Solar Street Lights Compariso
How to Choose the Right Solar Street Light Pole
Street Light Pole Cost Factors and Quotation Compa
High Mast Light Specifications and Selection Guide
Features of All in One Solar Street Lights
How to Choose the Right LED Street Lights for Your
Select the Right LED Stadium Light for Football Pi
6-meter steel lamp post, 150W solar landscape ligh
Solar Street Lights Installed at Baybay Black Sand
Contact Us
Get a custom lighting solution and quotation for your project. Outdoor lighting manufacturer in Yangzhou, ChinaAbout Jieyao LightingYangzhou Jieyao Lighting Equipment Co., Ltd. is an outdoor lighting manufacturer focused on solar street light systems and high mas... Do you have any questions or requests?
Email: jay@jieyaolighting.com

Click to Chat.
Im online now.
Hey, I'm Xu Jie from Jieyao Lighting. What can I do for you? Welcome to contact me, WhatsApp: +86 13815843784
WhatsApp Us
🟢 Online | Privacy policy